This tweak is for broad band cable connections on stand alone machines with WinXP
professional version - might work on Home version also. It may also work with networked machines as well.
This tweak assumes that you have let WinXP create a connection on install for your
cable modem/NIC combination and that your connection has tcp/ip - QoS - file and print sharing - and client for Microsoft networks , only, installed. It also assumes that WinXP will detect your NIC and has in-box drivers for it. If it doesn't do not try this.
•In the "My Network Places" properties (right-click on the desktop icon and choose
properties), highlight the connection then at the menu bar choose "Advanced" then "Advanced Settings". Uncheck the two boxes in the lower half for the
bindings for File and Printer sharing and Client for MS networks. Click OK.
•From the Windows XP CD in the support directory from the support cab, extract the
file netcap.exe and place it in a directory on your hard drive or even in the root of your C:\ drive.
•Next, open up a command prompt window and change directories to where you put
netcap.exe. then type "netcap/?".
It will list some commands that are available for netcap and a netmon driver will be
installed. At the bottom you will see your adapters. You should see two of them if using a 3Com card. One will be for LAN and the other will be for WAN something or other.
•Next type "netcap/Remove". This will remove the netmon driver.
•Open up Control Panel->System->Dev Man and look at your network adapters. You
should now see two of them and one will have a yellow ! on it. Right-click on the one
without the yellow ! and choose uninstall. YES! You are uninstalling your network
adapter, continue with the uninstall. Do not restart yet.
•Check your connection properties to make sure that no connection exists. If you get
a wizard just cancel out of it.
Now re-start the machine.
•After re-start go to your connection properties again and you should have a new
connection called "Local area connection 2". Highlight the connection, then at the menu bar choose "Advanced" then "Advanced Settings". Uncheck the two boxes in the lower half for the bindings for File and Printer sharing and Client for MS networks. Click OK.
•Choose connection properties and uncheck the "QOS" box.
•Re-start the machine.
After restart enjoy the increased responsiveness of IE, faster page loading, and a
connection speed boost.
Why it works, it seems that windows XP, in its zeal to make sure every base is covered installs two separate versions of the NIC card. One you do not normally see in any properties. Remember the "netcap/?" command above showing two different adapters? The LAN one is the one you see. The invisible one loads everything down and its like your running two separate cards together, sharing a connection among two cards, this method breaks this "bond" and allows the NIC to run un-hindered.
Showing posts with label pc speed. Show all posts
Showing posts with label pc speed. Show all posts
Wednesday, December 24, 2008
Win XP Won't Completely Shutdown
Go to Control Panel, then go to Power Options.
•Click on the APM tab, then check the "Enable Advanced Power Management support."
•Shut down your PC.
It should now successfully complete the Shut Down process.
•Click on the APM tab, then check the "Enable Advanced Power Management support."
•Shut down your PC.
It should now successfully complete the Shut Down process.
Performance Increase Through My Computer
Easy enough tweak to usually find out about it on your own, but still, some of us
still don't find it right away. So here it is:
•Start > right-click on My Computer and select Properties.
•Click on the "Advanced" tab.
•See the "Performance" section? Click "Settings".
•Disable the following:
Fade or slide menus into view
Fade or slide ToolTips into view
Fade out menu items after clicking
Show Shadows under menus
Slide open combo boxes
Slide taskbar buttons
Use a background image for each folder type
Use common tasks in folders
There, now Windows will still look nice and perform faster.
Deal with System Hang at Startup
If your system hangs about 2 or 3 minutes at startup, where you can't access the Start
button or the Taskbar, it may be due to one specific service (Background Intelligent
Transfer) running in the background. Microsoft put out a patch for this but it didn't
work for me.
Here's what you do:
•Click on Start/Run, type 'msconfig', then click 'OK'.
•Go to the 'Services' tab, find the 'Background Intelligent Transfer' service.
•Disable it, apply the changes & reboot.
Speeding Up Your Pentium 2 by 50%
We all know that you really shouldn't try to run Windows XP on anything less that
about a Pentium 3 of some sort if you are out for speedy operations and amazing reaction times, but for those of us with the good old Pentium 2's who want to see just how well we can run XP, we have to tweak as much as we can where-ever we can.
A real killer to the system's performance is Windows Media Player. Although it may look desirable and fancy with it's rounded off edges and 3rd-Dimensional appearance, the truth is, it takes up a large amount of that precious processing power.
All of these troubles however, lead to one thing in particular with this 'new-look' over-rated music and video player...the Visualizations.
The look-great I'll admit but like a lot of software these days, it has no purpose. If you run the task manager, and click the Performance tab along the top, you'll see that when Windows Media Player is running and nothing else is active, it takes up around 50% of the processors power.
Once these visualizations are turned off, it barely takes up 2-3% of the processors power, which leaves much more room for other applications to work efficiently.
Here's how to disable the feature:
•Open Media Player.
•Make sure the Now Playing tab on the left is selected.
•Click the View menu along the top.
•Go down to Now Playing Tools.
•In the sub-menu that has just 'popped-out', uncheck Show Visualization
How to Shutdown XP Faster??
Like previous versions of windows, it takes long time to restart or shutdown windows
XP when the "Exit Windows" sound is enabled.
To solve this problem you must disable this useless sound.
•Click Start button.
•Go to settings > Control Panel > Sound, Speech and Audio devices > Sounds and Audio
Devices > Sounds.
•Then under program events and windows menu click on "Exit Windows" sub-menu and
highlight it. Now from sounds you can select, choose "none" and then click Apply and
OK.
Now you should see some improvements when shutting down your system.
Tuesday, March 4, 2008
Boost Firefox Speed
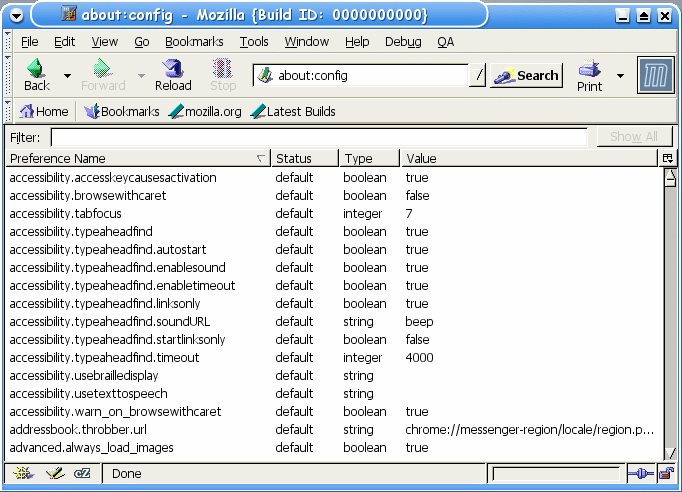
This tricks will improve the speed & load time of firefox. And you will be able to surf faster.
Type about:config in the address bar, Then look for the following entries, and make the corresponding changes.
1.network.http.max-connections-per-server =32
2.network.http.max-persistent-connections-per-proxy =16
3.network.http.max-connections = 64
4.network.http.max-persistent-connections-per-server = 10
5.network.http.pipelining = true
6.network.http.pipelining.maxrequests = 200
7.network.http.request.max-start-delay = 0
8.network.http.proxy.pipelining = true
9.network.http.proxy.version = 1.0
Lastly right-click anywhere and select New- Integer. Name it nglayout.initialpaint.delay and set its value to 0. This value is the amount of time the browser waits before it acts on information it recieves.Enjoy!!
SpeedUp PhotoShop Startup.
Photoshop required large memory to function well (1 GB or more is preferable) because it handle image files. Here discussing how to speed up startup of Photoshop.
Each time Photoshop start, all plug-ins (necessary or unnecessary) also load with Photoshop. You can prevent unnecessary plug-ins by loading thus reduce start up time.

Navigate to C:\program files (assuming ‘C’ is your installed directory)\Adobe. Open the directory. Here you can see folder named ‘plug-ins’. Within this folder you find the plug in files, all of which loaded each time Photoshop started.
You can disable plug-ins which you scarcely use. To do this simply edits the name of the files or folders containing plug-ins and insert a tilde (~) before each name. You can always re-enable the plug-ins by deleting the symbol ‘~’.
Each time Photoshop start, all plug-ins (necessary or unnecessary) also load with Photoshop. You can prevent unnecessary plug-ins by loading thus reduce start up time.
Navigate to C:\program files (assuming ‘C’ is your installed directory)\Adobe. Open the directory. Here you can see folder named ‘plug-ins’. Within this folder you find the plug in files, all of which loaded each time Photoshop started.
You can disable plug-ins which you scarcely use. To do this simply edits the name of the files or folders containing plug-ins and insert a tilde (~) before each name. You can always re-enable the plug-ins by deleting the symbol ‘~’.
Secure Erase Your Computer History
In this step by step guide you will learn about: Deleting cache, cookies, all history from your browser under a limited account. Manually means without the use of programs or softwares
Step by Step:
1. To begin with you have to get to search utility in windows I will mention a couple of ways you can do this because sometimes under a limited account they block it or remove the shortcut so you can't get to it.
* A. Click start - > click where it says search
* B. Open up internet explorer -> look up where it says view -> explorer bar -> search
* C. Or just simply press Ctrl + E while in you browser
2. Now that your in search click all files and documents
* at the bottom it says more advanced options click on that
* Then check the line that says Search hidden folders and files
3. Now type history, click search.
4. When you get the results it should be a couple but the one you need should say history and at the side of it the location should be something like
C:\Documents and Settings\your user name\Local Settings
5. Now right click the result and the click Open Containing Folder
6. The rest is pretty simple you just need to open up the four different folders you will find there
* Open "Apps Folder" delete everything on it
* Open "Temp Folder" delete everything on it
* Open "History Folder" delete everything on it
* Open "Temporary Internet Files Folder" delete everything on it
7. Your finish nobody will ever know you were even online
Speed up your internet by 20%
Microsoft reserves 20% of your available bandwidth for their own purposes like Windows Updates and interrogating your PC etc
You can get it back:
Click Start then Run and type "gpedit.msc" without quotes.This opens the group policy editor. Then go to:
Local Computer Policy
then Computer Configuration
then Administrative Templates then Network then QOS Packet Scheduler and then to Limit Reservable Bandwidth.
Double click on Limit Reservable bandwidth. It will say it is not configured, but the truth is under the 'Explain' tab i.e."By default, the Packet Scheduler limits the system to 20 percent of the bandwidth of a connection, but you can use this setting to override the default."
So the trick is to ENABLE reservable bandwidth, then set it to ZERO. This will allow the system to reserve nothing, rather than the default 20%.It works on Win 2000 as well.
Subscribe to:
Posts (Atom)


